The New Flip My Space: A Complete How-To Guide to Tools, the Redesigned Editor, and My Creations
Flip My Space just got a serious upgrade, and this one changes how you work rather than just what you can make.
Until now, staging a photo meant one big transformation: upload, pick a style, generate. That's still here and it's better than ever. But most real edits are smaller and more specific than that. You don't always want to redesign the whole room. Sometimes you just need the lawn to look alive, the walls to be a different color, or the pool to stop looking like a swamp.
So we built Tools: a menu of focused, single-purpose edits you can run in seconds. We also rebuilt the editor around them, and rebuilt My Creations so every image you've ever made is one click away and ready to edit again.
Here's the full walkthrough.
1. The Tools Page: Pick the Job, Not the Settings
Open the app and the first thing you'll see is a simple question: What would you like to do?
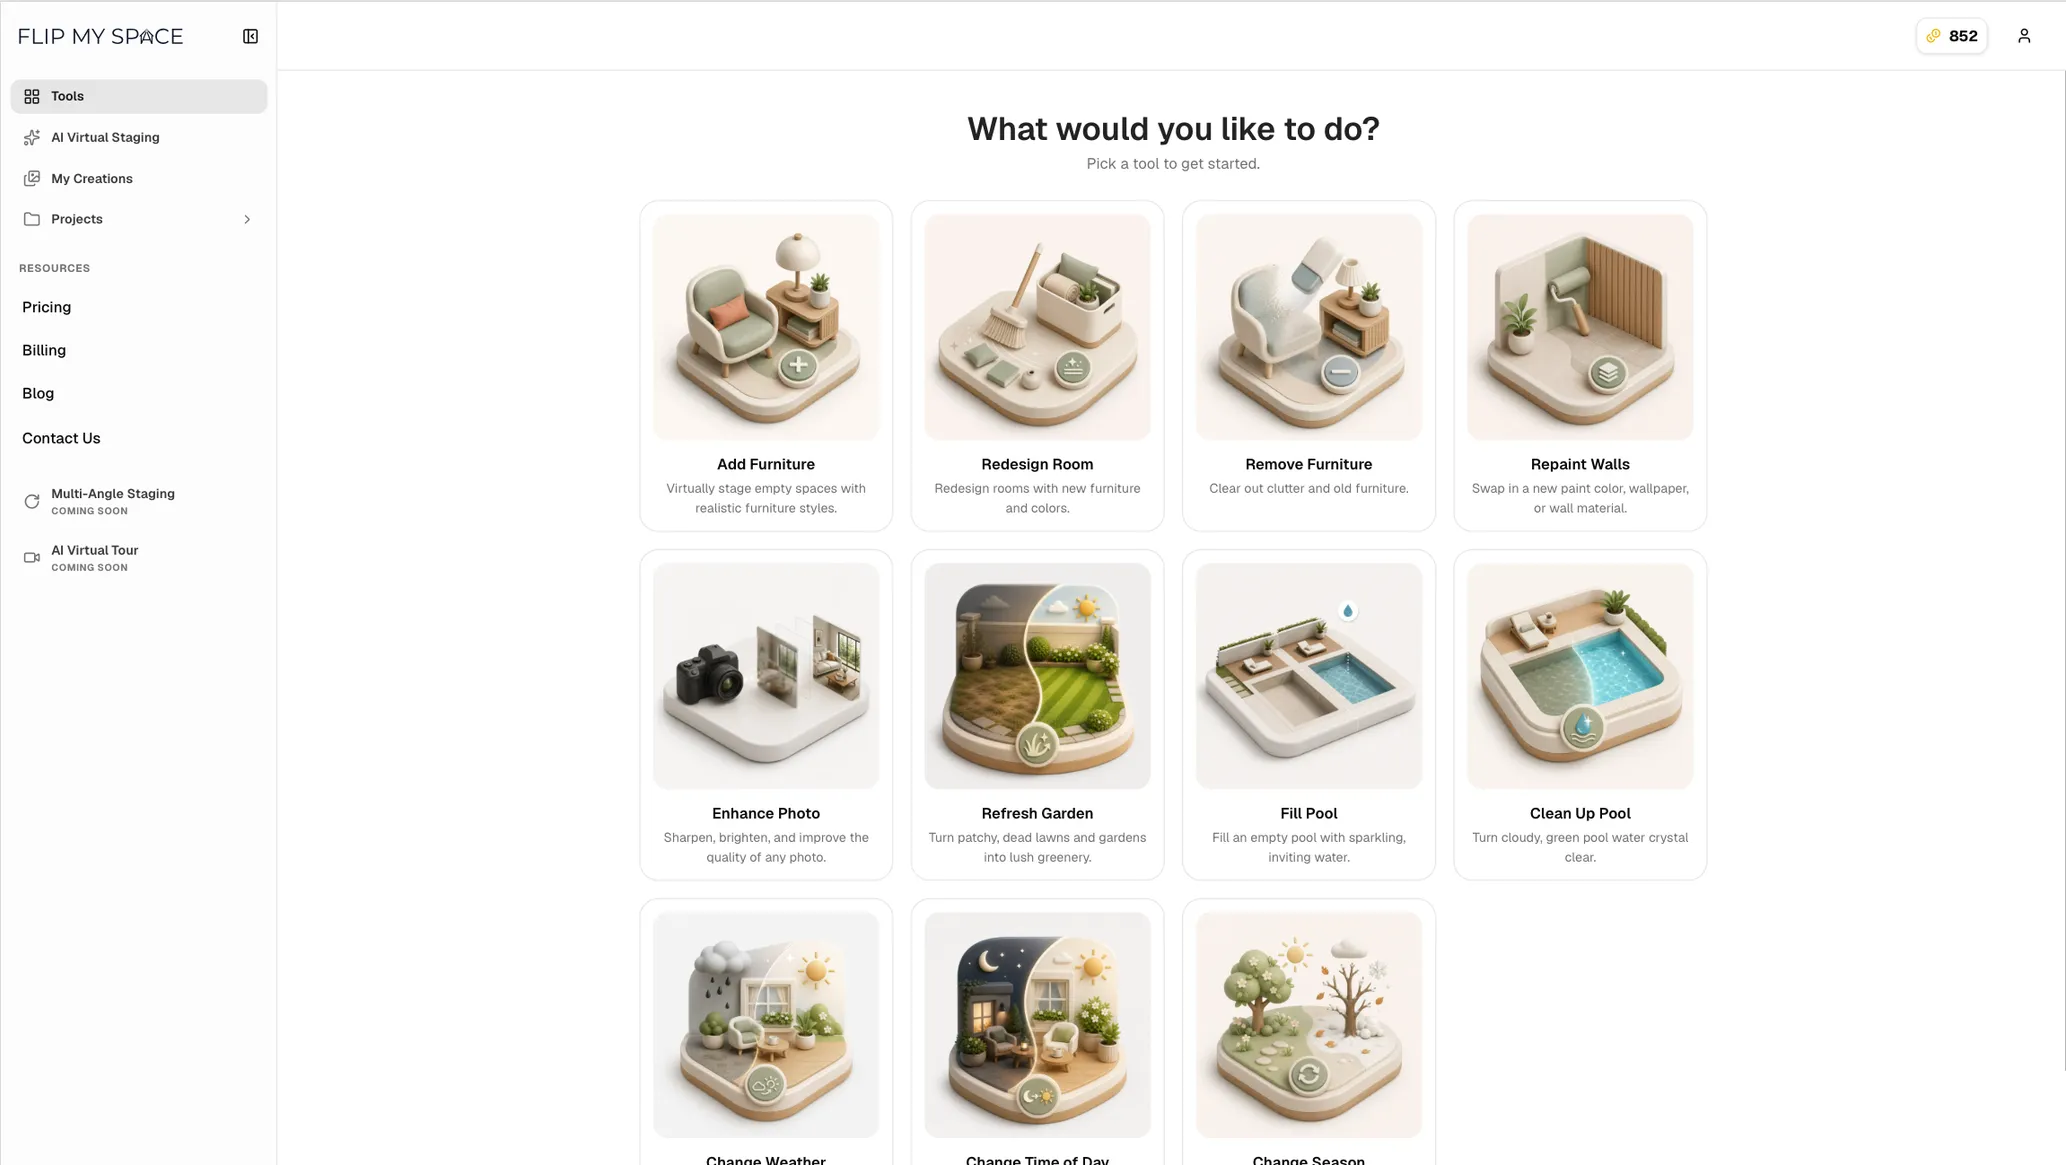
Instead of one general-purpose generator with a pile of options, you now choose the specific job you want done:
- Add Furniture — virtually stage empty spaces with realistic furniture styles.
- Redesign Room — redesign rooms with new furniture and colors.
- Remove Furniture — clear out clutter and old furniture.
- Repaint Walls — swap in a new paint color, wallpaper, or wall material.
- Enhance Photo — sharpen, brighten, and improve the quality of any photo.
- Refresh Garden — turn patchy, dead lawns and gardens into lush greenery.
- Fill Pool — fill an empty pool with sparkling, inviting water.
- Clean Up Pool — turn cloudy, green pool water crystal clear.
- Change Weather, Change Time of Day, and Change Season — for exterior shots taken on the wrong day, in the wrong light, or in the wrong month.
Each tool knows what it's for, which means you're not writing careful prompts or hunting for the right strength slider. You pick the outcome and the tool handles the rest.
You'll also spot two more in the sidebar marked Coming Soon: Multi-Angle Staging and AI Virtual Tour. More on those another day.
Example: Refresh Garden
Let's walk through one. Click Refresh Garden and you land on a focused page for that single job.
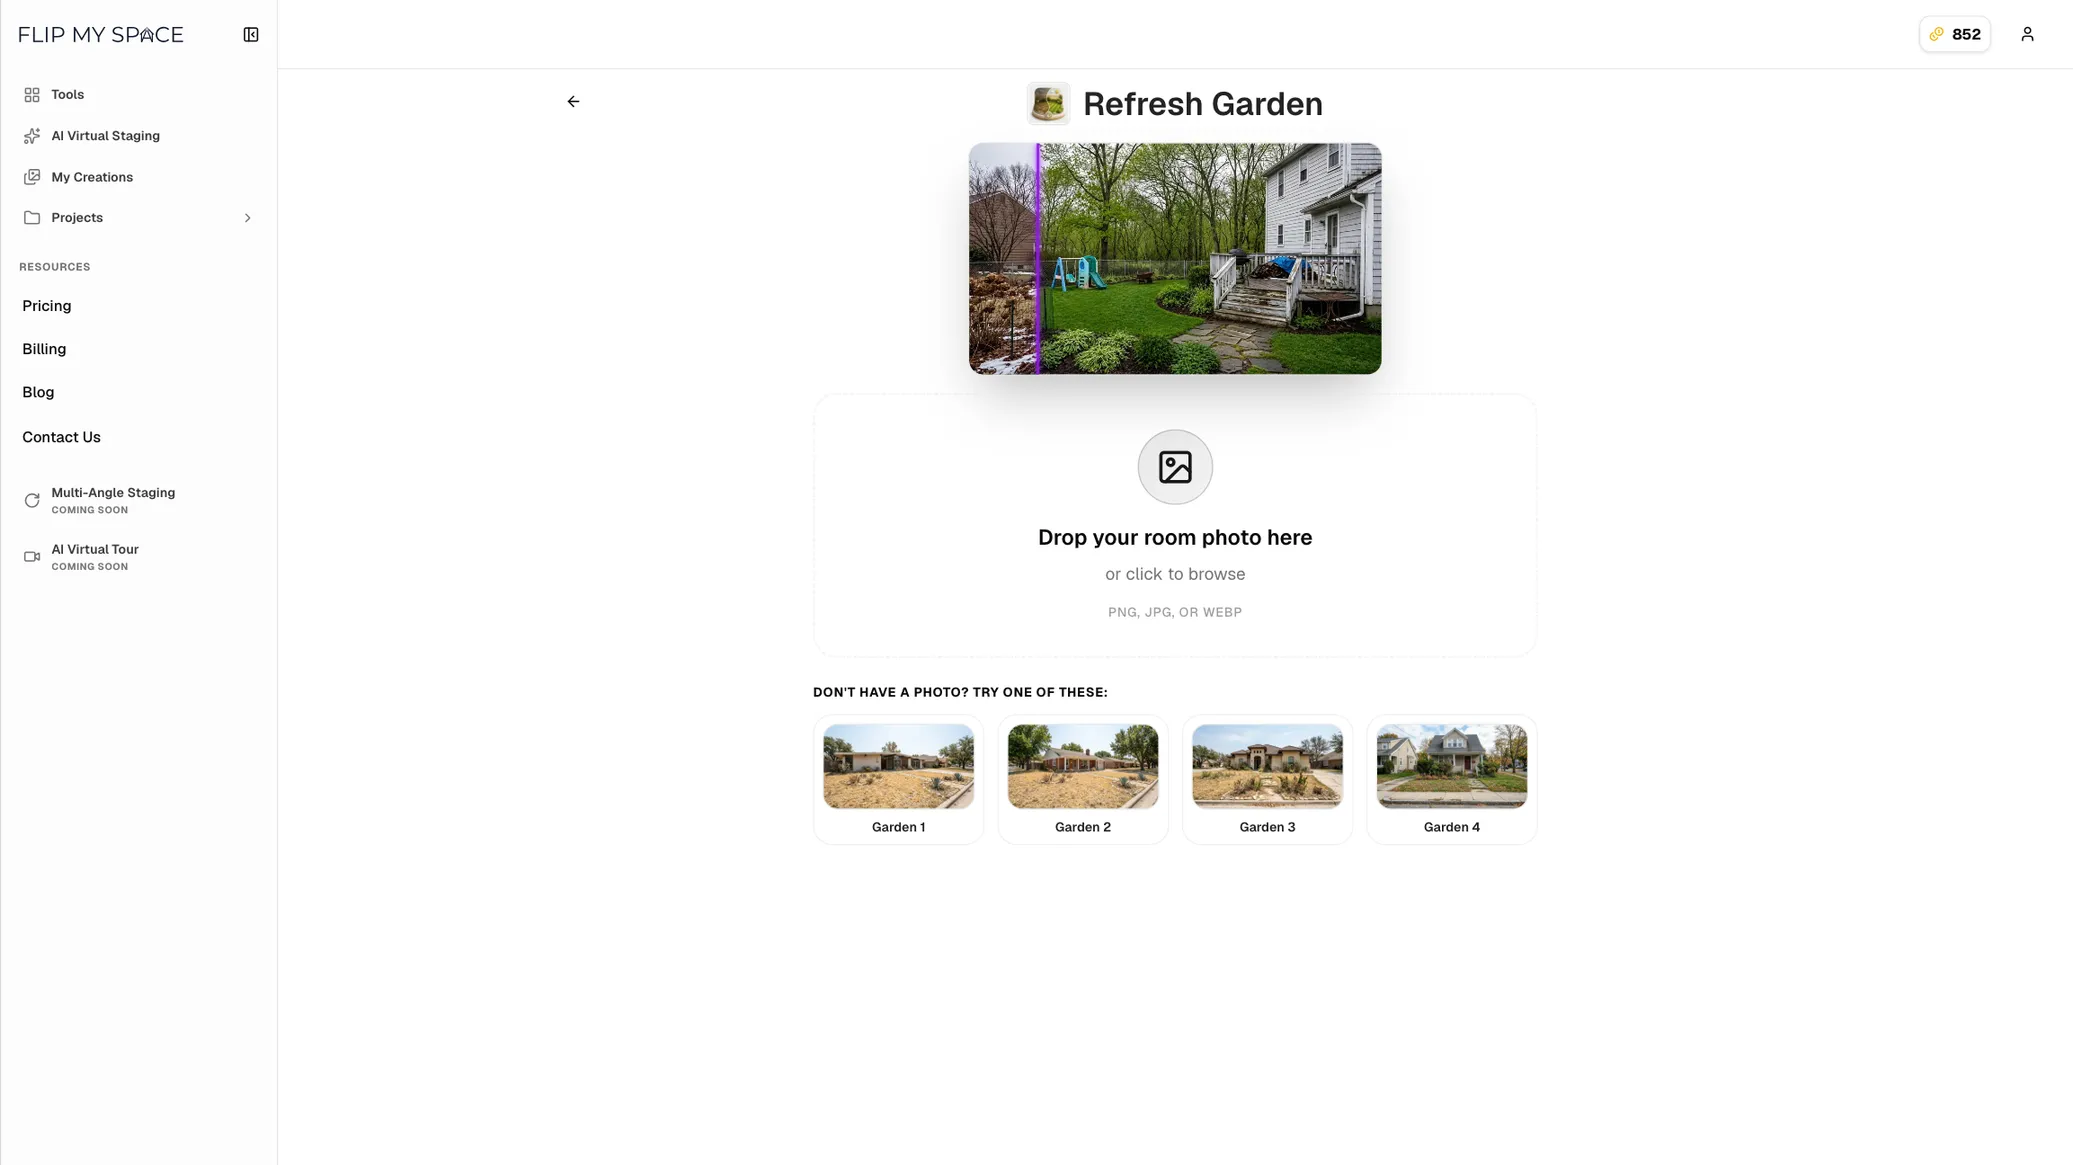
Three things worth noticing here:
- A preview at the top shows you exactly what this tool does, with a slider dividing the dead, patchy version from the lush green result.
- A drop zone takes your own photo — drag it in or click to browse. PNG, JPG, or WEBP.
- Sample photos sit underneath. Don't have a listing photo handy? Click Garden 1 through 4 and try the tool immediately, for free, on a real image.
That last part matters. Every tool ships with samples, so you can see whether a tool does what you need before you spend a credit on your own photo.
Curb appeal is the first thing a buyer sees, and a brown, patchy lawn quietly drags down every other photo in the listing. This is a ten-second fix.
2. The Redesigned Editor: Before, In Progress, and After
The editor itself has been rebuilt. It's cleaner, faster, and it actually tells you what's happening while it works.
Let's run a full AI Virtual Staging job on an empty living-diner.
Before
You start with your photo, the style picker, and a Generate button. That's it.
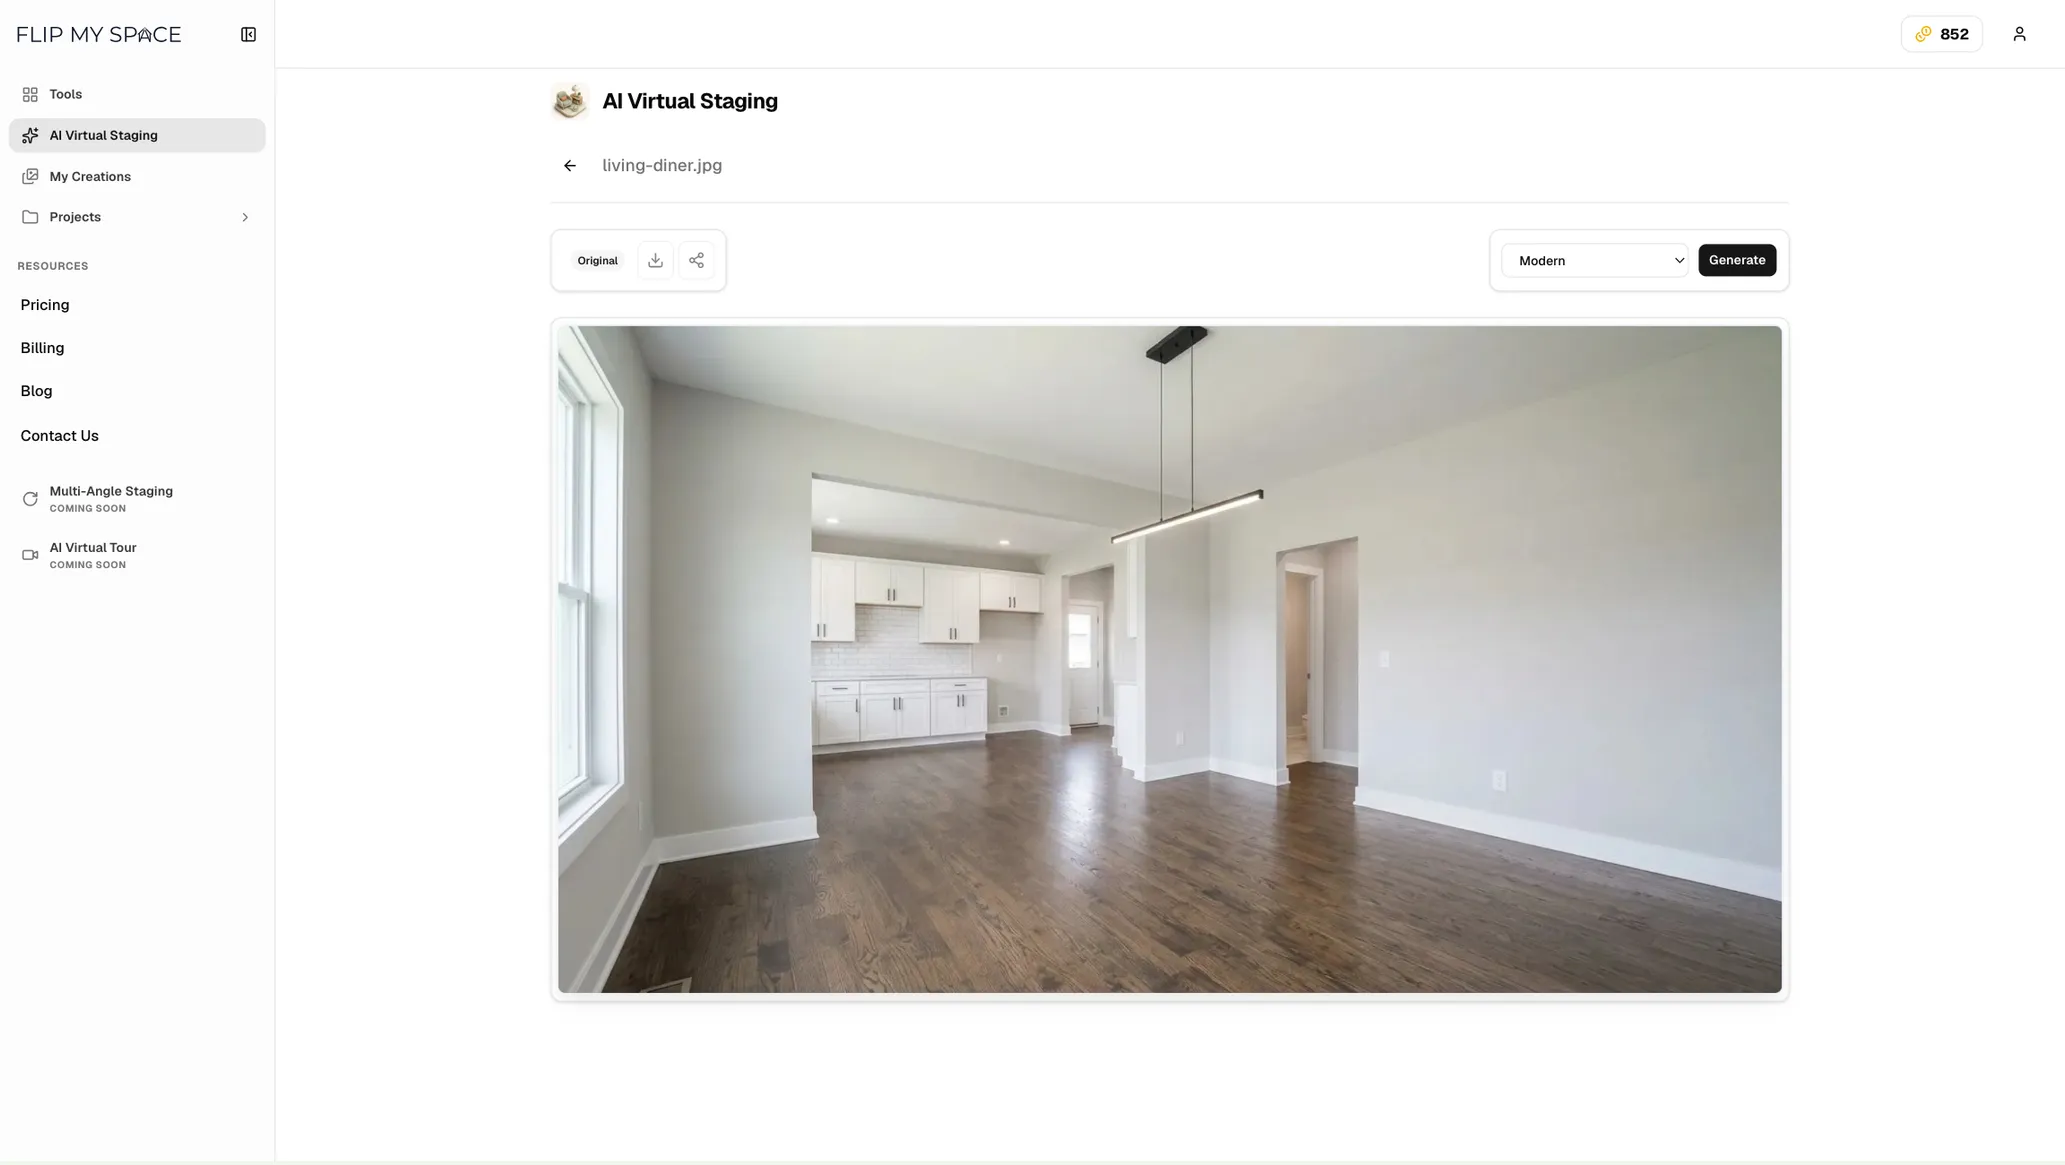
The room is empty, the light is good, and the Modern style is selected. Notice the toolbar on the left: an Original badge telling you which version you're looking at, plus download and share buttons always within reach.
In Progress
Hit Generate and the editor gives you real feedback instead of a blank spinner.
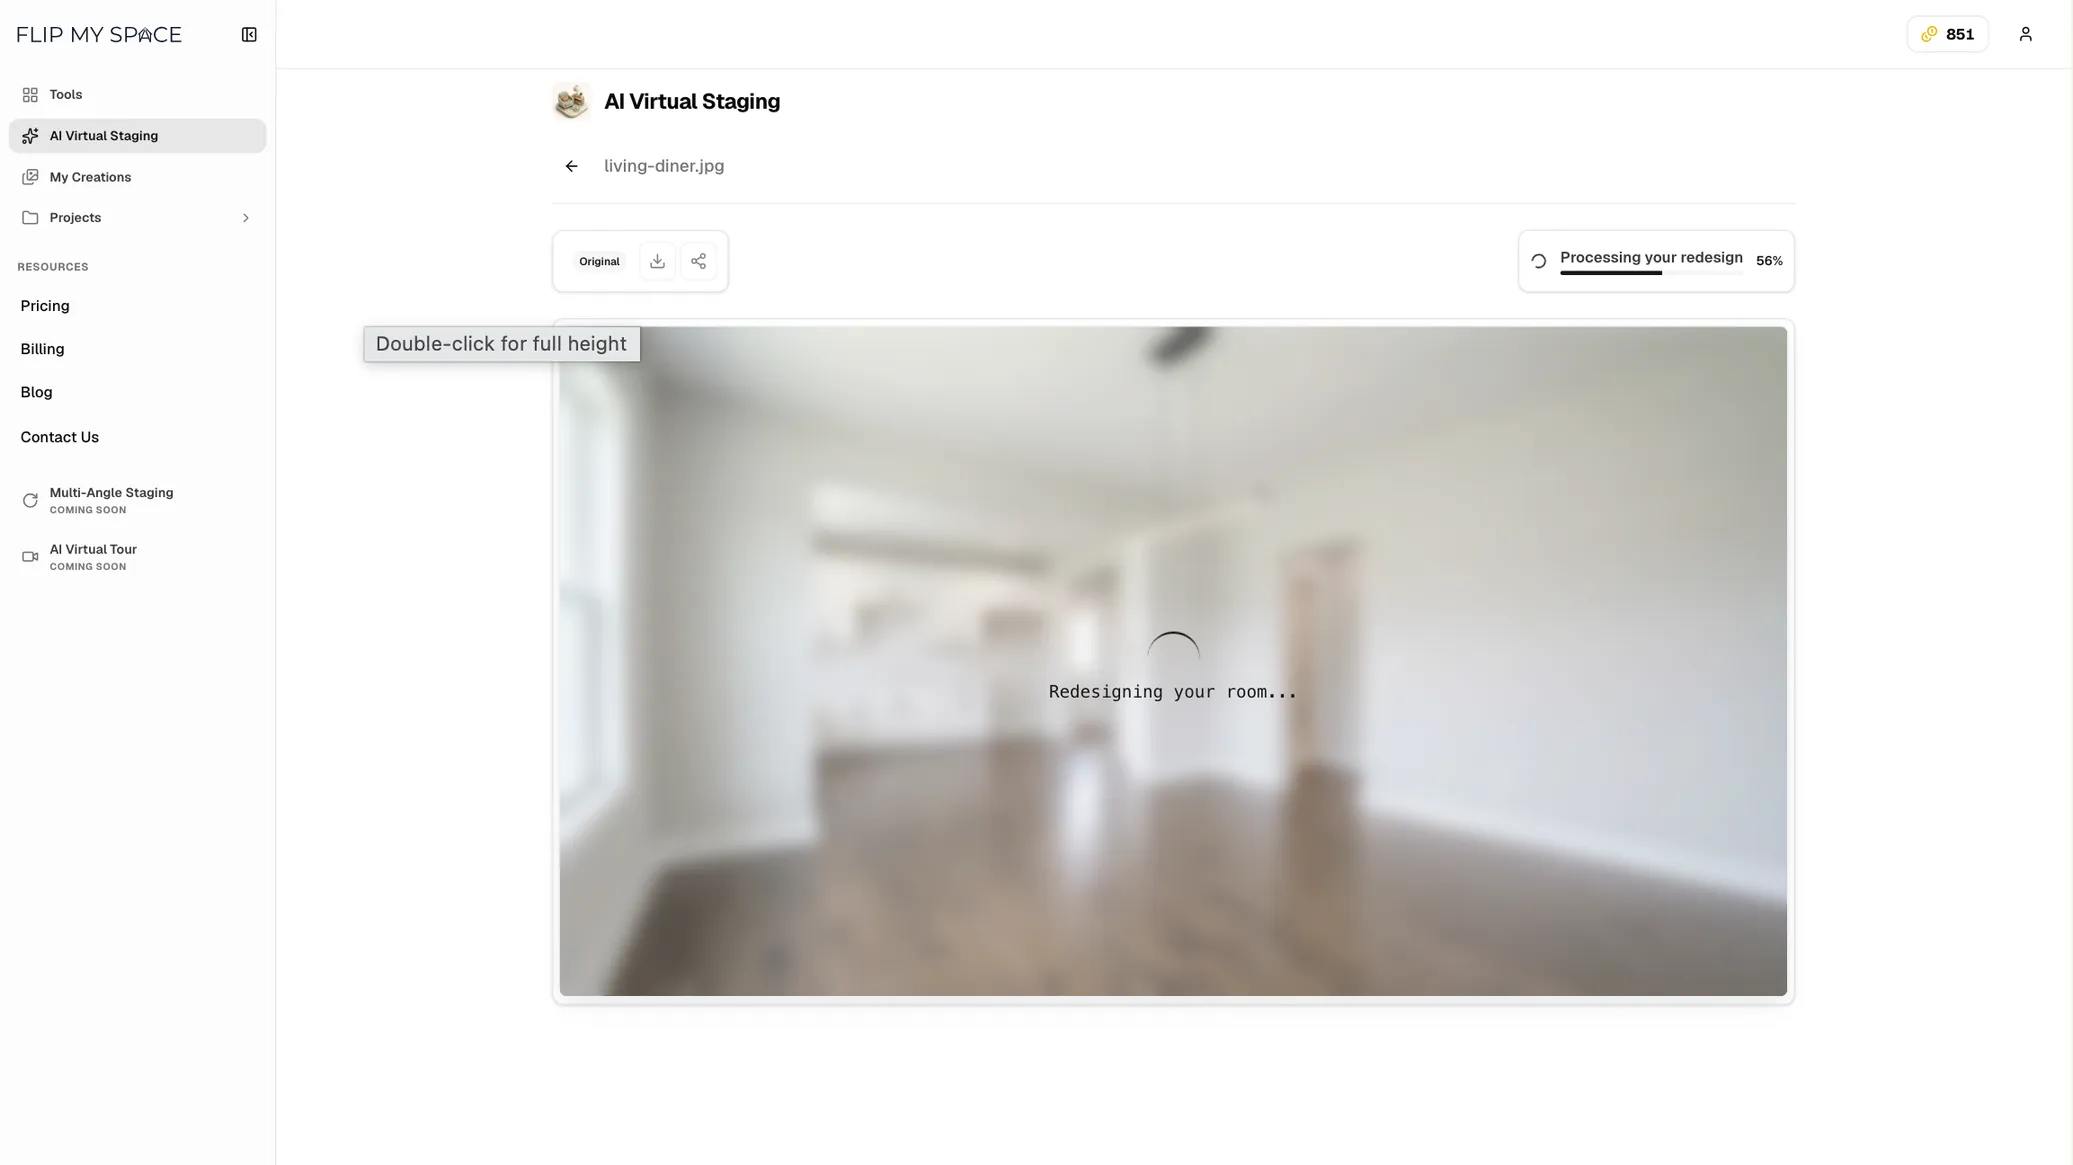
You get a live progress bar — Processing your redesign, 56% — and a blurred preview of the room underneath so you know it's working on the right image. No guessing whether the click registered.
After
And here's the result, in the new before-and-after comparison view.
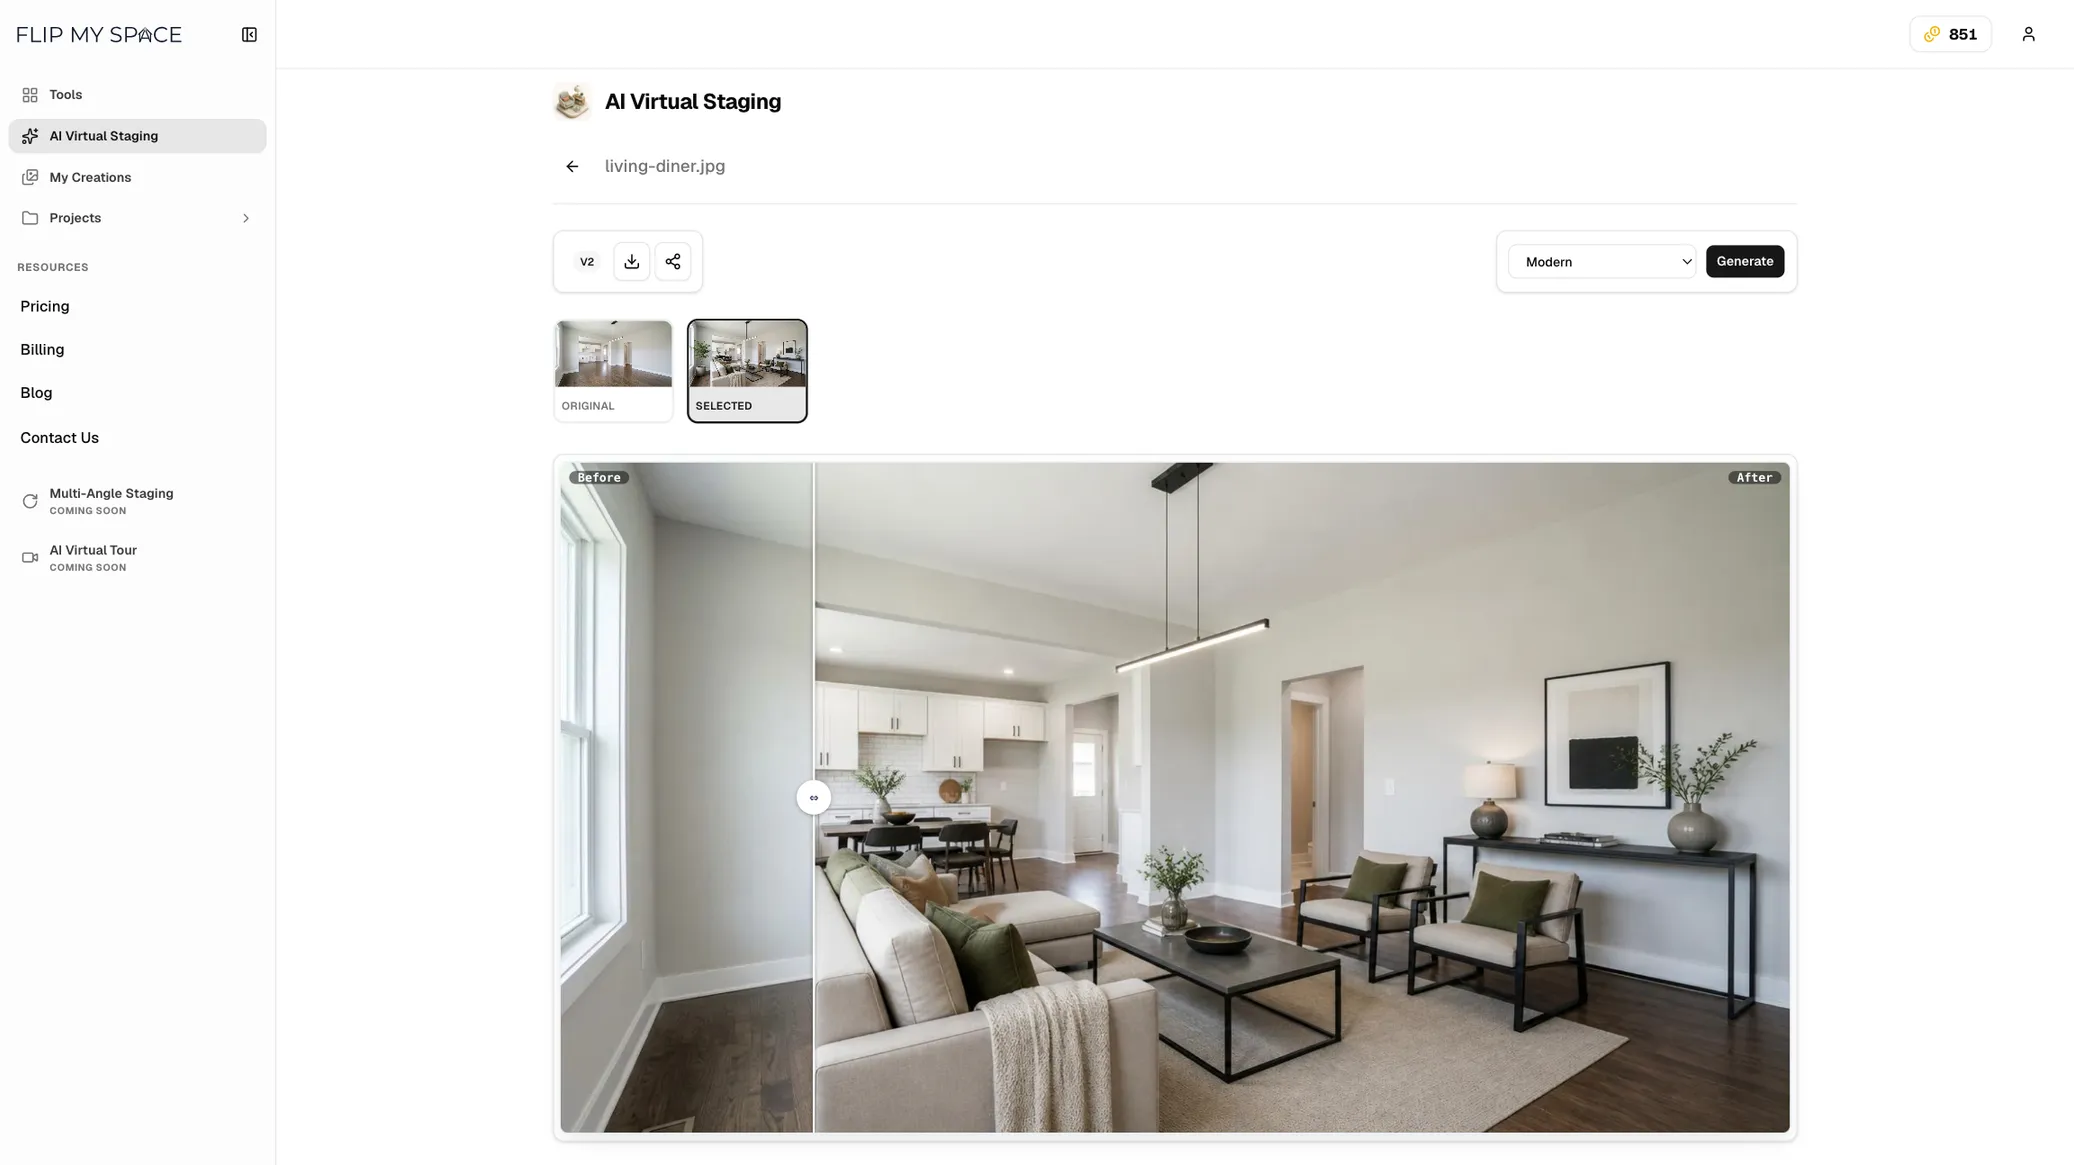
Drag the handle in the middle to wipe between the empty room and the staged one. It's the most satisfying part of the whole app, and it's genuinely useful when you're showing a client what the space could become.
Two details to point out:
- Version thumbnails. Under the toolbar you'll see Original and Selected thumbnails. Every generation is kept, so you can flip between them and pick the one you like best. The badge now reads V2.
- Generate again, freely. The style picker and Generate button stay right where they were. Don't love this take? Change the style, hit Generate, and add another version to the stack.
3. My Creations: Everything You've Ever Made
Every image you generate lands in My Creations, now a proper gallery.
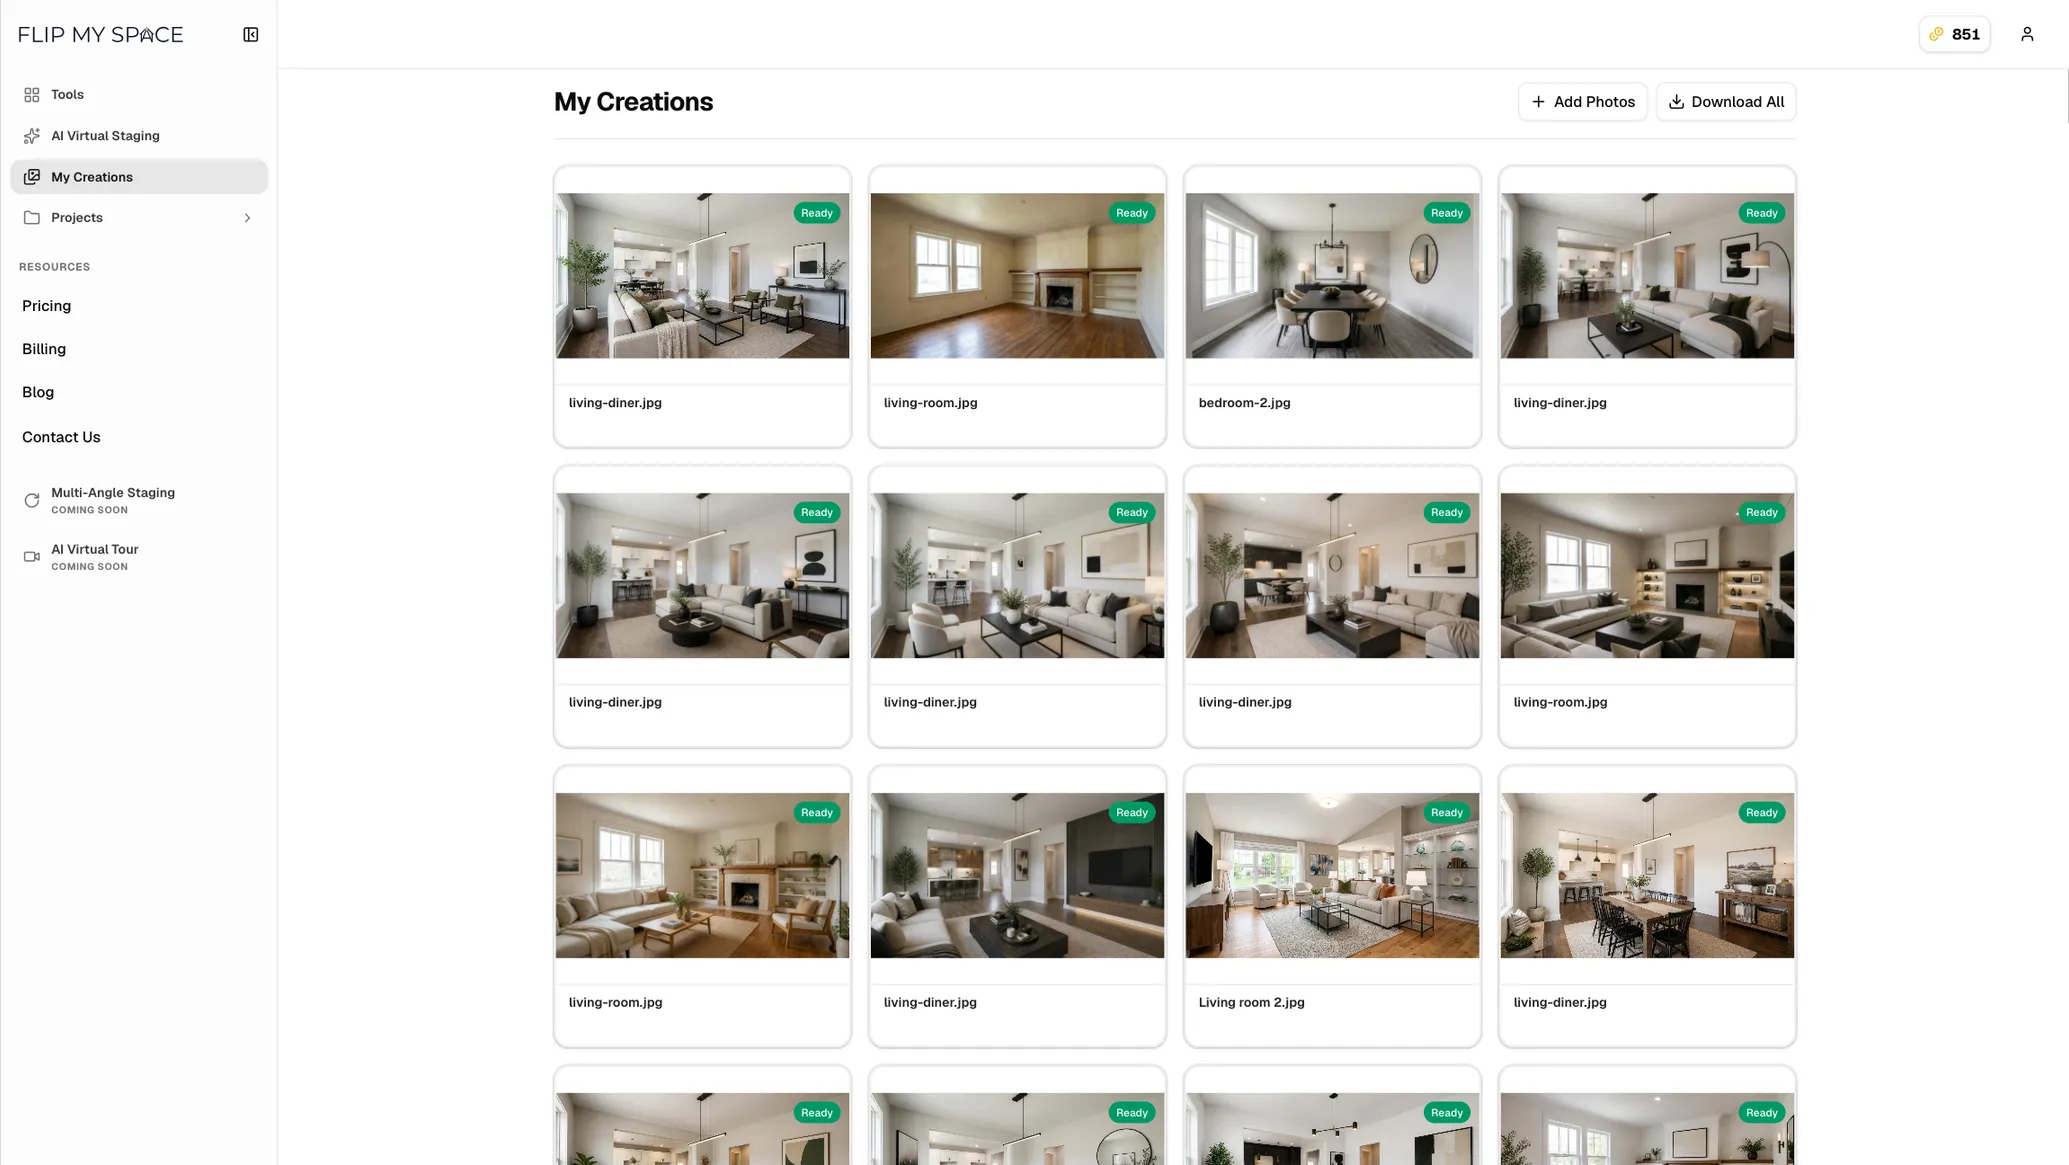
This is your full history. Every generation, every version, every room, with a Ready badge and the original filename so you can find things quickly.
At the top right there are two buttons that save a lot of clicking:
- Add Photos — pull new images straight into your library without going through a tool first.
- Download All — grab the whole set in one go when a listing is ready to publish.
Grouping Work Into Projects
If you're staging more than one property, use Projects in the sidebar to keep things separated. Group every room of "123 Main Street" into one project, keep a different client in another, and let My Creations remain the single place where everything lives.
The combination is the useful bit: My Creations for "show me everything I've made", Projects for "show me just this listing."
4. Editing in Stages: Stack Tools on One Photo
Open any image from My Creations and you can keep editing it with a different tool. Your finished staging becomes the starting point for the next edit.
Click into a creation and choose Edit with a Tool:
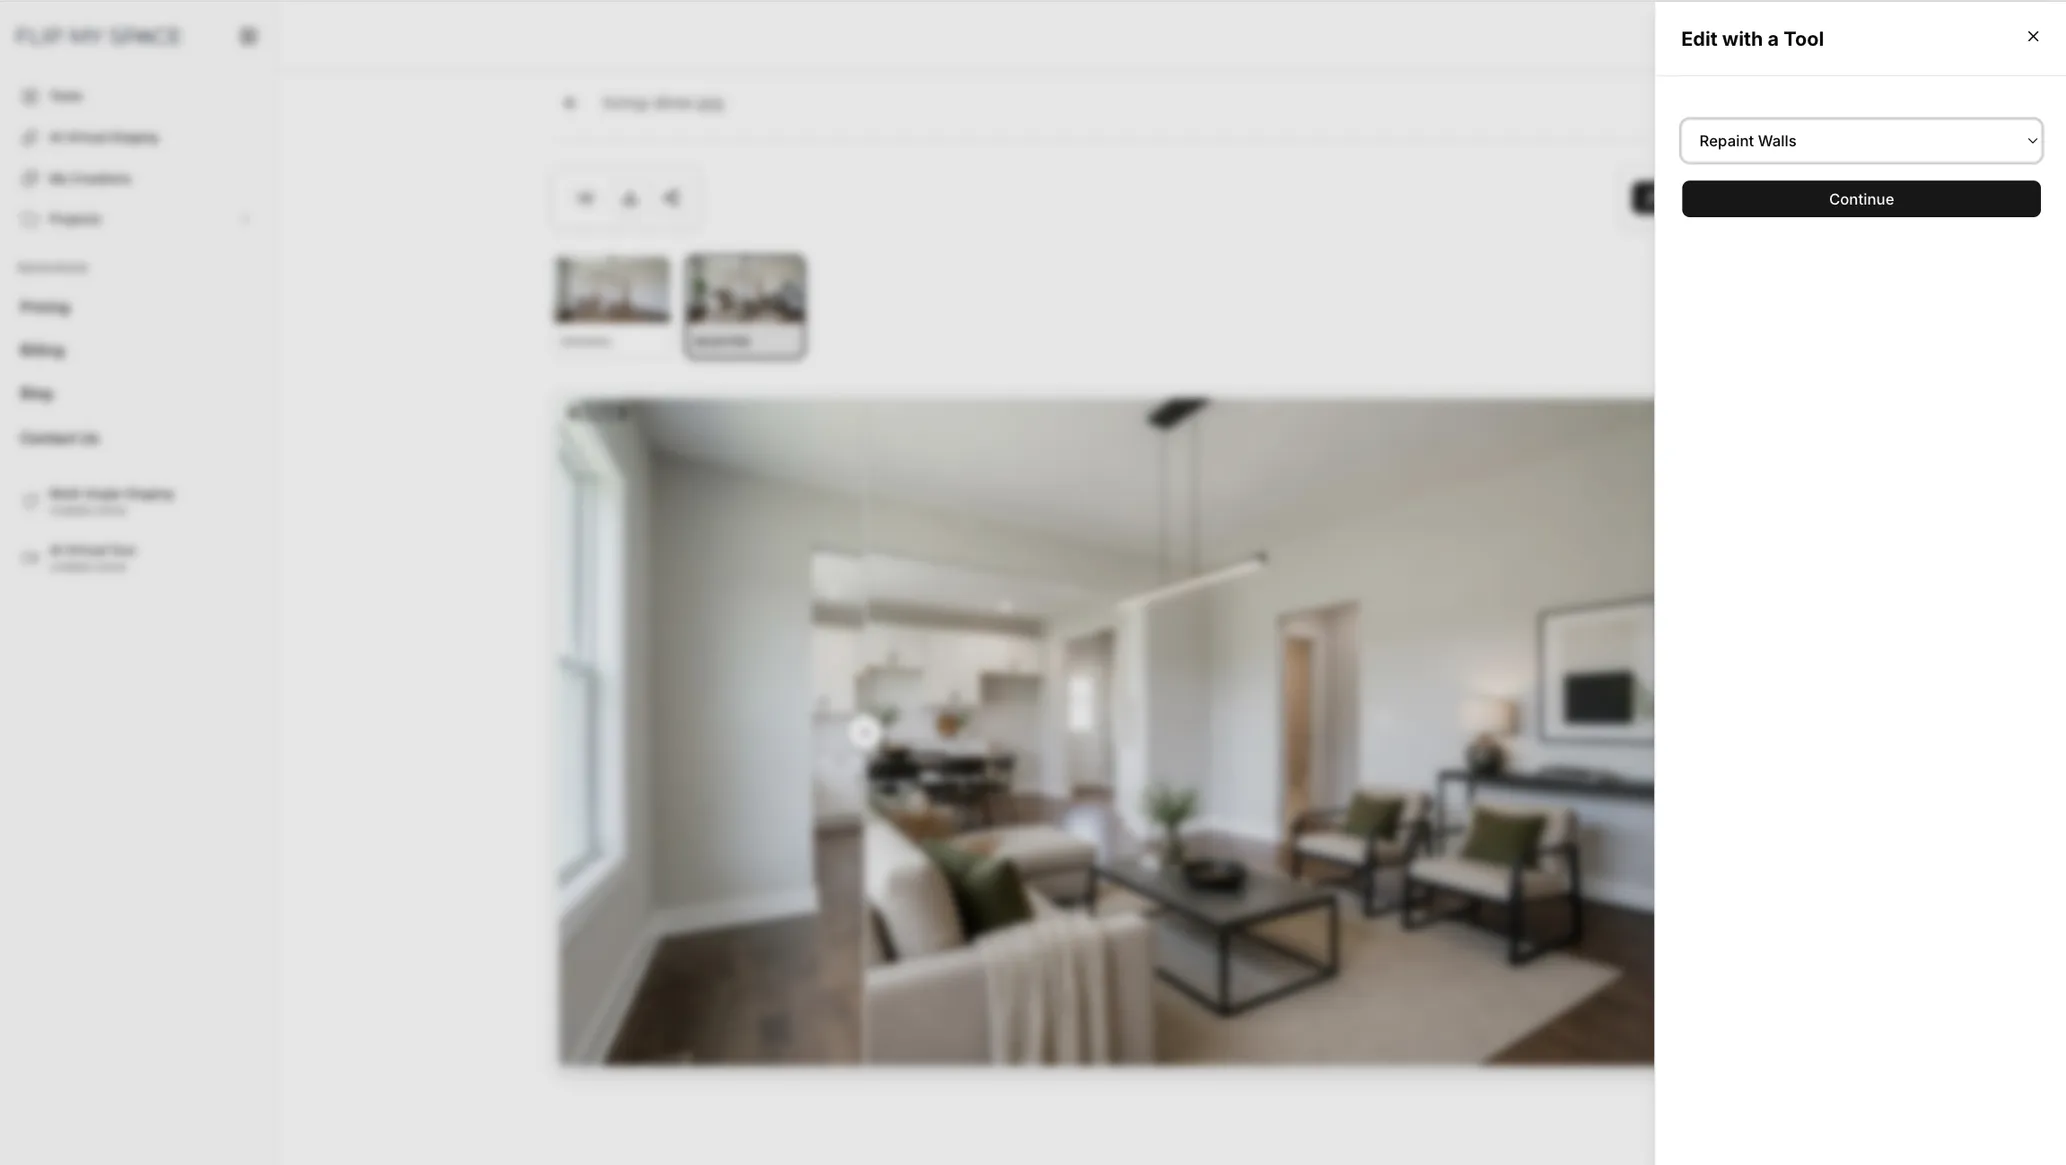
A panel slides out with a dropdown of every available tool. Pick one — here it's Repaint Walls — and hit Continue.
The editor reloads with that tool active, your staged image already loaded as the base:
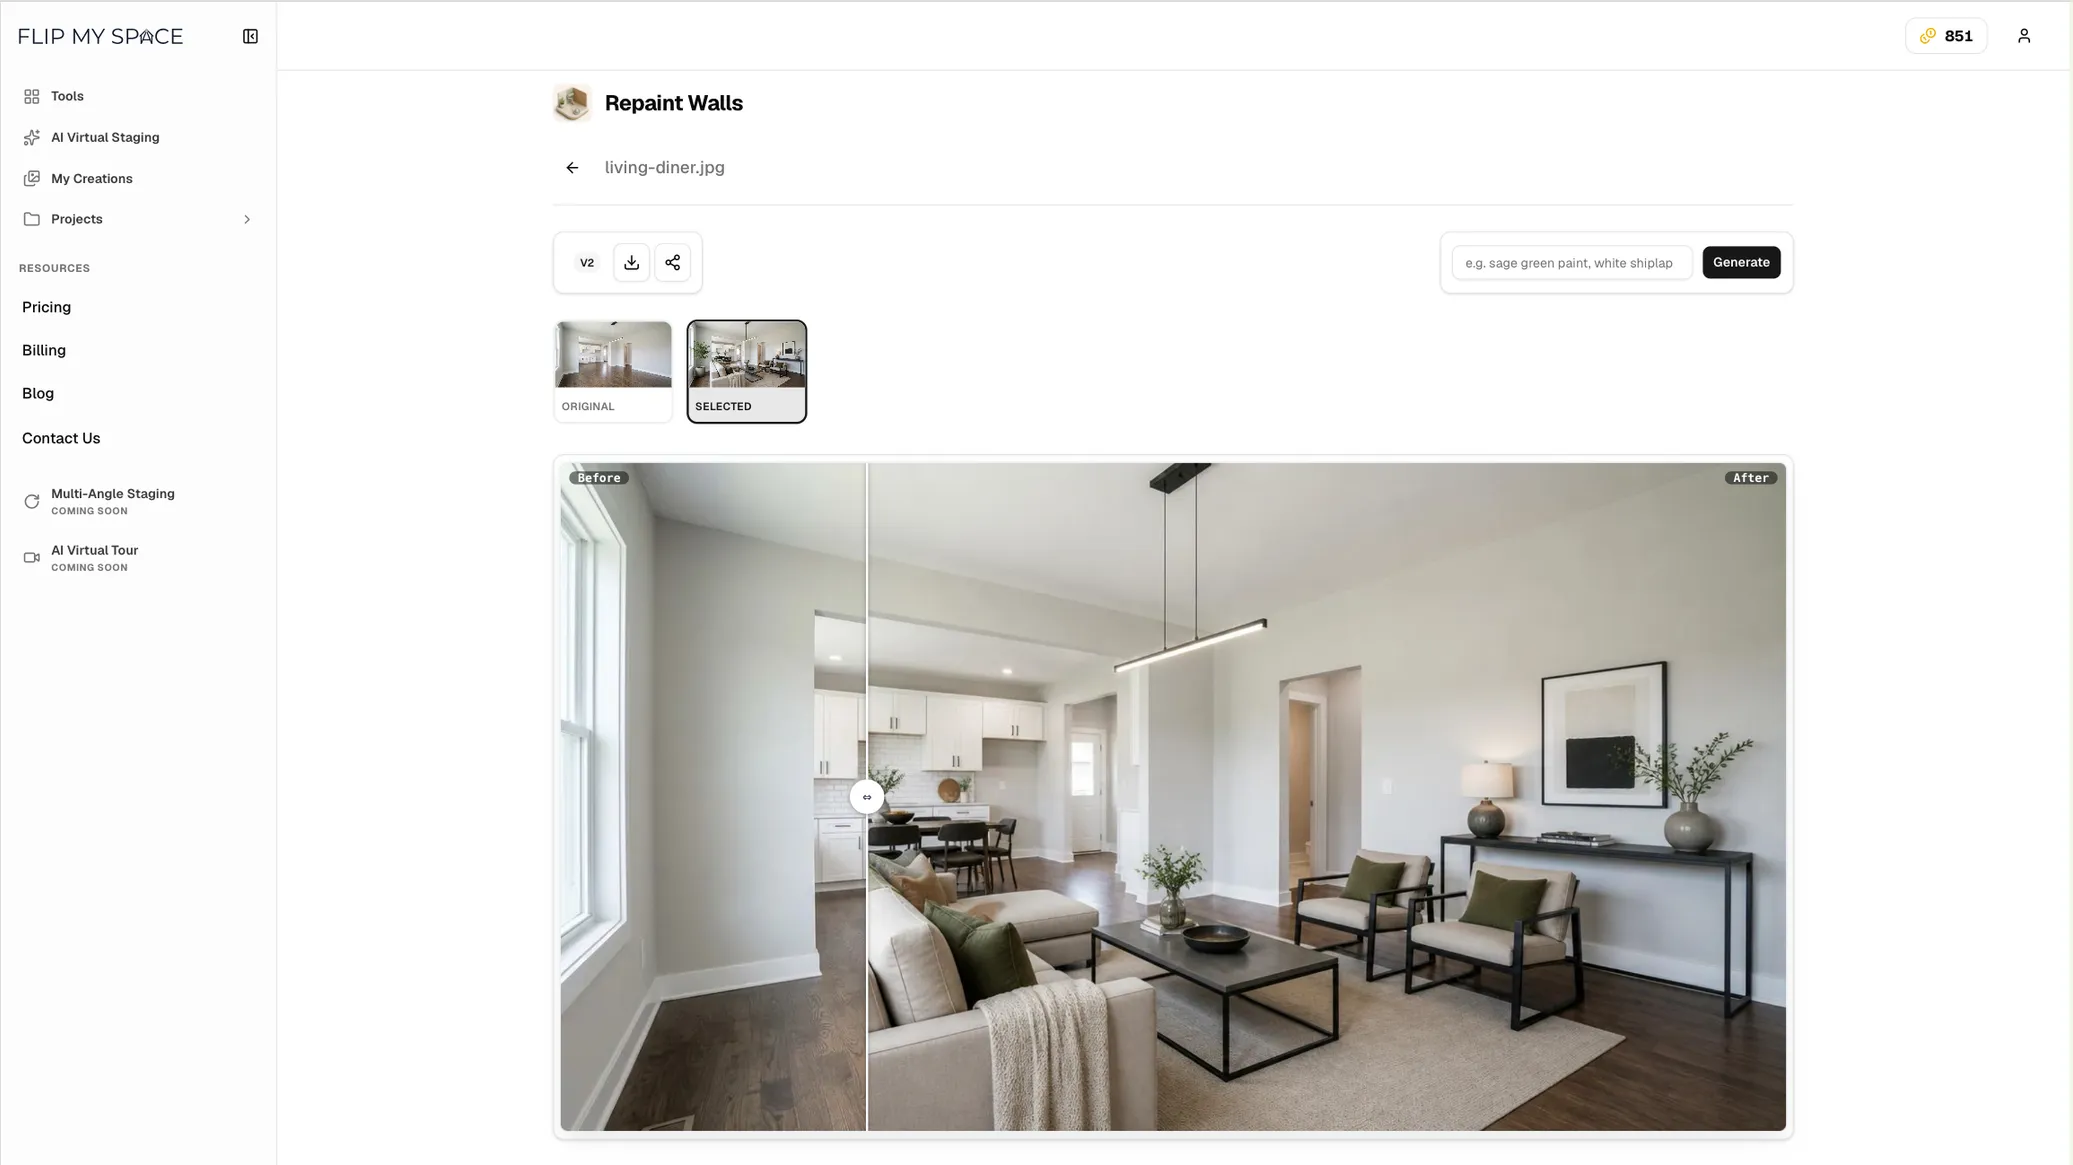
Notice what changed. The style dropdown has been replaced by a text field specific to this tool: e.g. sage green paint, white shiplap. Repaint Walls wants to know what you want on the walls, so that's what it asks for. Each tool asks for exactly what it needs and nothing else.
Your version thumbnails and the before/after slider come along too, so you're still comparing against the original at every step.
Why This Matters
You can now build a photo up in layers, one deliberate change at a time:
- Remove Furniture to clear out the seller's dated sofa.
- Add Furniture or Redesign Room to stage it in a Modern look.
- Repaint Walls to test sage green instead of builder beige.
- Enhance Photo to sharpen and brighten the final frame.
Each stage is a small, controllable step that you can accept, redo, or roll back by picking an earlier version. That's far more reliable than trying to describe all four changes at once and hoping the AI gets every one of them right.
And it works for exteriors just as well: Refresh Garden, then Clean Up Pool, then Change Time of Day for a warm golden-hour finish.
A Quick Recap
Here's the whole new workflow in five lines:
- Open Tools and pick the job you want done.
- Drop in your photo, or try a sample first.
- Watch it work with a live progress bar, then drag the before/after slider.
- Find everything later in My Creations, grouped by Projects.
- Reopen any image and Edit with a Tool to stack another change on top.
Try It Now
The Tools page, the redesigned editor, the new My Creations gallery, and staged tool-by-tool editing are all live today for every user.
Head into the editor and start with whichever tool fixes your worst photo. If you're not sure where to begin, Refresh Garden on an exterior shot or Add Furniture on an empty room will show you what this thing can do in about thirty seconds.
Make something good, then tag us — we still love seeing your before and afters.